Quick Answer
Measure, mark, then cut. Work out the finished height first — 30-36 in above a counter or table, 84 in of floor clearance in walkways — then shorten the cord or rod to suit. Cord can almost always be shortened; extending it usually cannot be done without ordering parts.
Kill power at the breaker, not the switch, and confirm with a tester. Check the ceiling box is rated for the fixture's weight before hanging anything from it.
In a run, consistency beats precision. Three pendants all 1/2 in low read fine; one pendant 1/2 in lower than its neighbours is the only thing anyone will see. Measure every drop from the same reference surface.
Cord-hung and rod-hung fixtures shorten differently. Cord adjusts at the canopy by pulling slack through; rod systems come in fixed sections that are added or removed, so the achievable heights are stepped rather than continuous.
Hanging a pendant is a short job with a few points where it goes permanently wrong: a cord cut too short, a run that is level to the ceiling instead of to the counter, a canopy that never sits flush because the ceiling is not flat. None of these are difficult to avoid, but all of them are difficult to undo. This guide covers the sequence in the order it actually happens — measuring, cutting, wiring, levelling and aligning a run — along with what to check before you start and when to stop and call an electrician.
On this page
Before You Start
- Kill power at the breaker, not the wall switch. A switch in the off position can still leave conductors live in the box. Confirm with a non-contact tester at the box before touching a wire.
- Check the box rating. The marked rating is stamped inside the box. Most pendants stay under 35 lb and a standard listed box handles them, but read it rather than assume — older boxes frequently rate lower than expected.
- Confirm the box is a fixture box, not a receptacle box. Fixture boxes are secured to framing or a brace; a shallow box fixed only to drywall will not hold a hanging load.
- Have the fixture's parts laid out. Canopy, mounting strap, cross bar, screws, wire nuts, cable grips. A part discovered missing mid-install with the power off is an evening wasted.
- Two people for anything above shoulder height. One holds the fixture while the other makes connections — supporting a pendant by its wires while working is how conductors get pulled loose.
Working Out the Finished Height
Finished height is measured to the bottom of the fixture, not to the canopy or the cord's end. Work it out before touching anything.
| Position | Finished height | Measured from |
|---|---|---|
| Over a kitchen island | 30-36 in above the counter | Counter surface |
| Over a dining table | 30-36 in above the tabletop | Table surface |
| Over a walkway | 84 in of clear floor space | Finished floor |
| Beside a bed | 18-24 in above the nightstand | Nightstand surface |
| Entry or hallway | 84 in minimum, higher if the space allows | Finished floor |
| Stairwell | 84 in from the nose of each tread below it | Tread, not floor |
Three adjustments worth making before you commit. If the floor is not yet finished — tile, hardwood or underlay still to go down — add the finished thickness to your measurement, or the fixture ends up low. If the room has a tall occupant, take the upper end of a range. And in an open plan where a pendant is seen from a seated position across the room, check the sightline: a fixture at the correct height over the counter can still block a view from a sofa, which is easier to notice before the cord is cut than after.
Shortening Cord and Rod
The two suspension systems behave differently, and knowing which you have changes the sequence.
Cord-hung fixtures use fabric-covered or plain flex, gripped at the canopy. Most adjust by pulling slack up through the canopy and securing it with a cable grip or set screw — the excess coils inside the canopy and nothing is cut. Where the canopy is too small to hold the slack, the cord is trimmed, and that is the irreversible step. Trim the outer cord and the conductors separately, leaving the conductors 6-8 in longer so there is enough to work with at the connection.
Rod-hung fixtures use rigid stems in fixed lengths, usually 6 in and 12 in sections. Height is adjusted by adding or removing sections, which means the achievable heights are stepped rather than continuous — you may land 3 in from your target with no way to close the gap. Check the section lengths against your target height before ordering, particularly on standard ceilings where the margin is small.
Chain-hung fixtures shorten by removing links, with the supply cable woven through the chain and trimmed to match. Keep a few spare links; they cannot be added back once discarded and they are the only way to lower a fixture later.
The Hanging Sequence
- 1. Power off at the breaker and test. Non-contact tester at the box, every conductor.
- 2. Fit the mounting strap. The metal bar that bridges the box and carries the fixture's threaded stud or screws. Tighten it to the box, not to the drywall.
- 3. Hold the fixture at the target height. A second person holds while you check from a few feet back. This is the last easy chance to change your mind.
- 4. Shorten the suspension. Coil slack in the canopy, remove rod sections, or trim — whichever the system uses.
- 5. Make the connections. Black to black, white to white, ground to ground, each twisted and capped with an appropriately sized wire nut. Tug each connection to confirm it holds.
- 6. Tuck and fit the canopy. Fold conductors into the box without pinching them, and bring the canopy up flush. If it will not sit flat, see the problems section below.
- 7. Fit lamps and restore power. Match lamp type and colour temperature across all fixtures in the room before switching on.
- 8. Check the level from a distance. Stand back and look along the fixture rather than at it — small tilts are invisible up close and obvious from across the room.
Spacing and Aligning a Run
A run of pendants introduces two variables a single fixture does not: spacing between them, and consistency of height across them.
Spacing follows the surface below. Over an island, roughly one pendant per 24-30 in of counter length, with the outer fixtures kept inside the counter's ends rather than aligned to them. A 72 in island takes two or three; a 96 in island takes three. Divide the usable length into equal parts and centre a fixture in each — not equal gaps between fixtures, which leaves the end spacings wrong.
A practical method for a run: cut a length of timber or stiff card to your target drop, hold it against the counter beneath each position, and set each fixture to touch it. This removes the tape measure from the process entirely, which is where inconsistency creeps in. For sizing and count decisions before installation, see our pendant count guide and island height guide.
Equal thirds with fixtures centred in each, all set from the counter surface rather than the ceiling
Single-Pendant Picks (4 Designs)
Fixtures hung alone over a table, a breakfast bar or in an entry. Check the suspension type before ordering — cord adjusts continuously, rod adjusts in steps.

1Iris Gold Glass Pendant Light
Single Drop · One BoxThe straightforward install: one fixture, one existing box, one connection. A single pendant is also the most forgiving of a slightly uneven ceiling, since there is no neighbour to compare its height against — the tolerance that makes a run difficult simply does not apply.
Height: 30-36 in above a table, 84 in in walkways
Tolerance: Forgiving — no neighbour to match
Match to: Brass or warm gold hardware
Related: Glass pendant lights
2Tyra Lantern Pendant Light Fixture
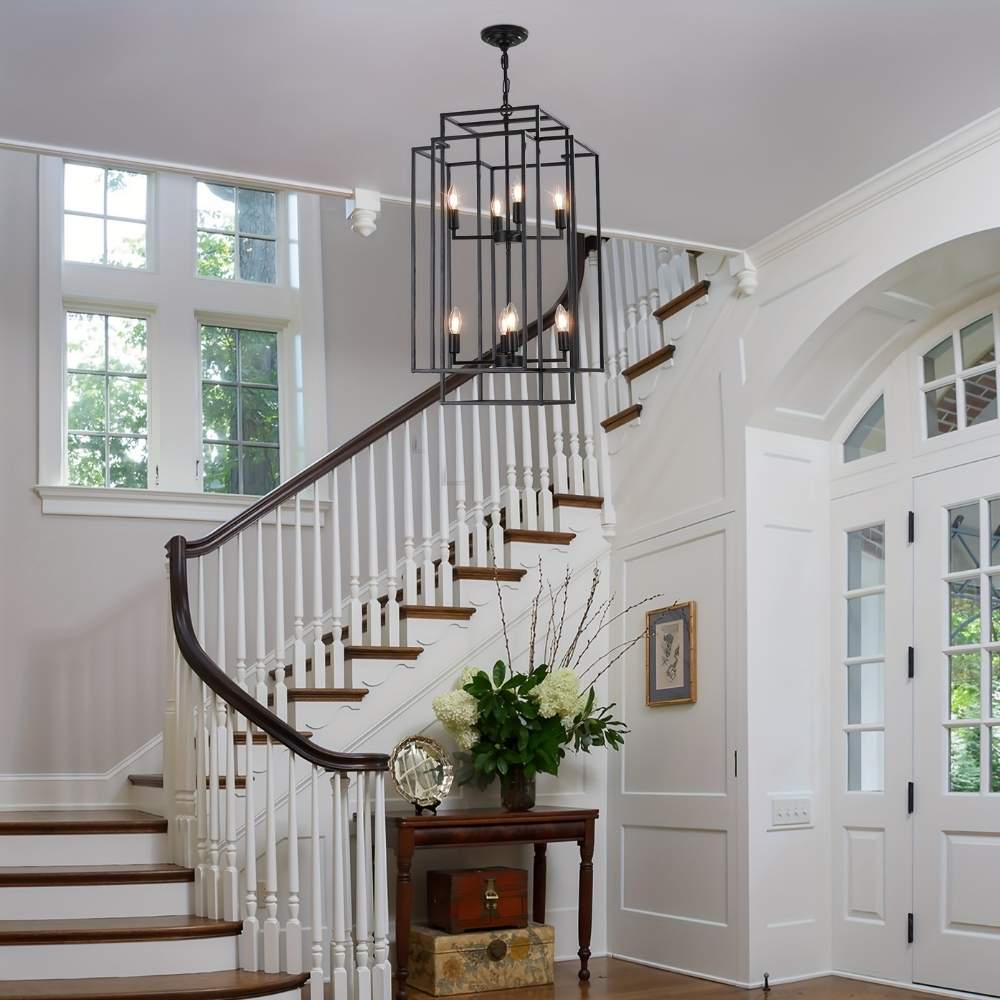
Entries · Enclosed BodyIn an entry or hallway the fixture hangs in the field of view at head height rather than above a surface, which makes an enclosed body worth having — no bare lamp at eye level. Also the case where the 84 in clearance rule governs rather than a surface measurement, so measure from the finished floor.
Why enclosed: No bare lamp at head height
Measure from: Finished floor — add flooring not yet laid
Best in: Entries, hallways, stair landings
Related: Modern pendant lights

3Pia Contemporary Pendant Chandelier
One Box, More PresenceWhere the ceiling has one box but the position deserves more than a plain shade. Structurally this installs exactly like a single pendant — same strap, same connections — but check the listed weight against the box rating first, since detailed fixtures at this scale sit higher up the weight range than a simple shade does.
Check first: Listed weight against the box rating
Size: 39.37" (100 cm)
Two people: Recommended for the lift
Related: Pendant chandeliers

4Leda LED Pendant Chandelier
Integrated LED · Get the Height Right First TimeIntegrated-LED fixtures raise the stakes on the height decision, because there is no lamp change to bring you back up the ladder later — the fixture is hung once and left for decades. Worth spending the extra minute holding it at the target height before cutting anything.
Check first: Dimmer compatibility with the driver
Wiring: Standard — driver usually inside the canopy
Note: Do not pinch driver leads under the canopy
Related: Integrated LED guide
Run-Friendly Picks (4 Designs)
Compact bodies with low visual weight, which is what lets three or four read as one line rather than as separate objects. Set every drop from the counter surface, not the ceiling.

5Chiara Scandinavian Pendant Light
15.75 in · Repeats CleanlyAt 15.75 in this sits in the size band that repeats well — large enough to register individually, small enough that three do not crowd a standard island. Low visual weight per unit is the specification that decides whether a run reads as a line or as clutter, and it is not something a product page states directly.
Spacing: One per 24-30 in of counter length
Set from: Counter surface, all three identical
Finishes: Silver or black
Related: Pendant lights

6Dove Glass Bubble Light Fixture
Three Sizes · Fit the Island You HaveThree sizes matters more in a run than for a single fixture, because island lengths rarely land on convenient numbers. Buying the size that suits your spacing beats compromising to the nearest available — and it is easier to change the fixture size than the island. Glass bodies also stay light, which keeps every drop well within standard box ratings.
Why it helps: Match the size to the spacing you need
Weight: Light — well within standard box ratings
Cleaning: Damp cloth acceptable on glass
Related: Glass pendant lights

7Piper Rattan Pendant Chandelier
Lightweight · Easy Single-Handed LiftWoven shades are among the lightest fixtures in the catalog, which makes the physical part of hanging a run genuinely easier — one person can support the fixture while the other makes connections without strain. Keep them clear of the hob, since natural fibre cannot be wet-cleaned when cooking film settles.
Size: 15.75" (40 cm)
Placement note: Away from the hob — no wet cleaning
Lamps: LED — cooler, protects the fibre
Related: Rustic pendant lights

8Amanda Modern Silver Chandelier
Linear · When the Boxes Are WrongThe install that rescues a bad box layout. Where boxes were placed before the island length was final — the most common and least fixable pendant problem — a linear fixture centred on one box distributes light along the same axis without needing the other two. It sidesteps the levelling question entirely, since there is only one drop.
Needs: One box, centred on the island
Sidesteps: Cross-fixture levelling — one drop only
Size to: ½ to ⅔ of the island's length
Related: Linear chandeliers
Browse pendant lighting
Single drops, run-friendly compacts and linear alternatives.
Pendant Lights → Pendant Chandeliers → Linear →Four Problems and Their Fixes
The canopy will not sit flush. Almost always an uneven ceiling rather than a faulty fixture — textured or slightly bowed surfaces leave a gap on one side. A canopy trim ring or a thin foam gasket closes it. Do not overtighten the canopy screws to force contact; that bends the canopy and makes the gap permanent.
The fixture hangs crooked. Check the mounting strap is square to the box and the cable grip is centred in the canopy. On cord-hung fixtures a coiled cord inside the canopy can push the cord off-centre as it exits — recoil it more evenly and the tilt disappears.
One pendant in a run sits low. Measure all three from the counter rather than from the ceiling. If they measure equal and still look uneven, the counter or ceiling is out of level; split the difference so no single fixture is the outlier.
The cord is too short after cutting. Contact the manufacturer for a replacement cord set — most stock them. Do not splice an extension into the run: a joint inside a cord is both a code issue and a failure point under the fixture's weight.
When to Call an Electrician
- No box exists at the position you want. Adding one means opening the ceiling, locating framing and running cable.
- The fixture exceeds the box's marked rating. A brace box or structural blocking is needed, which is ceiling work.
- The existing wiring has no ground conductor, or the insulation is brittle or discoloured — common in older properties.
- The ceiling is above roughly 12 ft. Access equipment plus overhead wiring is a different job from a step stool.
- You are converting a switched receptacle or adding a dimmer circuit. Both change the circuit rather than the fixture.
A like-for-like swap on an accessible ceiling, with a fixture under 35 lb and a box that is rated for it, is within reach of a confident homeowner working with the breaker off. Anything that changes the circuit or the box is not. Wider electrical guidance is in our installation and safety guide.
Common Mistakes
- Cutting the cord before holding the fixture at height. The one irreversible step in the job.
- Measuring to the canopy instead of the fixture's bottom. Finished height means the lowest point.
- Measuring a run from the ceiling. Ceilings are rarely level. Set every drop from the counter.
- Forgetting flooring still to be laid. Add the finished thickness or the fixture ends up low.
- Equal gaps between fixtures instead of equal thirds. Leaves the end spacings wrong.
- Trusting the wall switch. Kill the breaker and test with a non-contact tester.
- Supporting the fixture by its wires. Pulls conductors loose at the terminal. Two people, or a hook.
- Overtightening the canopy to close a gap. Bends the canopy permanently. Use a trim ring or gasket.
- Splicing an extension into a short cord. A code issue and a failure point. Order a replacement cord set.
- Mixing lamp colour temperatures across a run. Immediately visible. Match all lamps before switching on.
Frequently Asked Questions
How do you hang a pendant light?
Kill power at the breaker and test, fit the mounting strap to the box, hold the fixture at the target height to confirm, shorten the cord or rod, connect black to black, white to white and ground to ground with wire nuts, fit the canopy flush, then fit lamps and restore power.
How high should a pendant light hang?
30-36 in above a counter or tabletop, 84 in of clear floor space over walkways, and 18-24 in above a nightstand beside a bed. In a stairwell, measure 84 in from the nose of each tread below the fixture rather than from a floor.
Can you shorten a pendant light cord?
Yes on almost all cord-hung fixtures. Most adjust by pulling slack up through the canopy and securing it with a cable grip, so nothing is cut. Where the canopy cannot hold the slack, trim the outer cord and leave the conductors 6-8 in longer for the connection.
Can a pendant light cord be lengthened?
Not by splicing — a joint inside a cord is a code issue and a failure point under the fixture's weight. Order a replacement cord set from the manufacturer, which most stock. This is why cutting is the step to measure twice for.
How far apart should pendant lights be over an island?
Roughly one per 24-30 in of counter length, with the outer fixtures kept inside the counter's ends. Divide the usable length into equal parts and centre a fixture in each rather than setting equal gaps between them.
How do I get pendants in a run level with each other?
Measure every drop from the counter surface rather than the ceiling, since ceilings are rarely level. A stick or card cut to the target drop, held against the counter under each position, removes the tape measure and the inconsistency it introduces.
Why will my canopy not sit flush against the ceiling?
Almost always an uneven or textured ceiling rather than a faulty fixture. A canopy trim ring or a thin foam gasket closes the gap. Do not overtighten the screws to force contact — that bends the canopy and makes the gap permanent.
Do I need a special ceiling box for a pendant?
A listed fixture box rated for the fixture's weight, secured to framing or a brace rather than to drywall alone. Most pendants stay under 35 lb, which a standard listed box handles — read the marked rating rather than assuming, since older boxes often rate lower.
What is the difference between cord, rod and chain suspension?
Cord adjusts continuously by coiling slack in the canopy. Rod comes in fixed sections, usually 6 and 12 in, so heights are stepped rather than continuous. Chain shortens by removing links — keep the spares, since they are the only way to lower the fixture later.
Can I hang a pendant where there is no ceiling box?
Not safely without adding one, which means opening the ceiling and running cable — an electrician's job. A plug-in pendant with a swag hook and cord is the alternative where no box exists and none can be added, as in a rental.
Should I install pendants before or after the countertop?
After, if possible. The counter is the reference surface for the drop measurement, and installing to a temporary surface risks a systematic error across the whole run. Where boxes must go in first, confirm the island's final dimensions before the electrician sets them.
How long does it take to hang a pendant light?
A like-for-like single swap takes 20-40 minutes with the power off. A run of three takes 1-2 hours, most of it in measuring and levelling rather than wiring. Adding boxes or altering the circuit is a different job entirely.
Measure Twice, Cut Once, Set From the Counter
Work out the finished height before touching a tool, hold the fixture there to confirm it, and only then shorten anything. In a run, measure every drop from the surface below rather than from the ceiling — consistency across the three is what the eye reads, and the ceiling is the one surface you cannot trust to be level.
Browse the range: pendant lights, pendant chandeliers, linear chandeliers.